Introduction
Insulating an attic is vital for maintaining your home’s comfort and energy efficiency. If you’re thinking about whether it’s worth insulating your attic, here are the quick benefits:
- Stable room temperatures
- Lower energy bills
- Extend HVAC lifespan
- Improve indoor air quality
- Increase home value
- Pest deterrence
- Prevent structural damage
Attics may seem like just a storage spot, but they play a huge role in the overall health of your home. Proper insulation can help keep your indoor temperature stable, reduce your energy bills, and enhance the air quality inside your house. It also extends the life of your HVAC system by reducing its workload and can add value to your property.
A well-insulated attic can even make unused spaces livable and deter pests from entering your home. Plus, it prevents structural damage by blocking moisture, which can lead to rotting wood or mold growth.
Ready to learn more? Dive in as we explore the ultimate techniques and tips for attic insulation.

Choosing the Right Insulation for Your Attic
When it comes to insulating an attic, picking the right type of insulation is key to maximizing energy efficiency and comfort. Let’s break down the different options, their benefits, and what you should consider based on your climate.
Fiberglass Insulation
Fiberglass is one of the most popular choices for attic insulation. It comes in batts or rolls and is made from fine glass fibers.
Pros:
– Affordable
– Easy to install
– Widely available
Cons:
– Can irritate skin and lungs during installation
– Lower R-value per inch compared to other materials
R-Value: Typically around R-3.2 per inch
Best For: Moderate climates and DIY projects
Cellulose Insulation
Cellulose insulation is made from recycled paper products and treated to be fire-resistant. It’s usually blown into place, making it great for filling gaps and covering irregular spaces.
Pros:
– Eco-friendly
– High R-value
– Excellent at blocking air leaks
Cons:
– Can absorb moisture
– Requires professional installation for best results
R-Value: Around R-3.7 per inch
Best For: Older homes with many gaps and cooler climates
Mineral Wool Insulation
Mineral wool, also known as rock wool, is made from volcanic rock or industrial waste. It’s known for its fire resistance and ability to block sound.
Pros:
– Excellent fire resistance
– Doesn’t absorb moisture
– Good soundproofing
Cons:
– More expensive than fiberglass
– Can be harder to find
R-Value: Approximately R-3.3 per inch
Best For: Areas needing fire resistance, such as homes with wood stoves or fireplaces
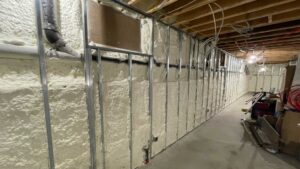
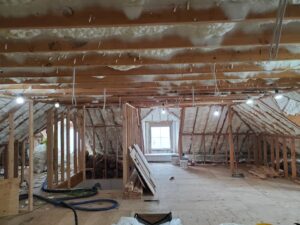
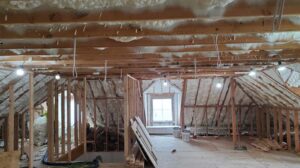
Spray Foam Insulation
Spray foam insulation is a liquid that expands and hardens after application. It’s excellent for sealing air leaks and providing a high R-value.
Pros:
– High R-value
– Excellent air sealing
– Expands to fill gaps
Cons:
– Expensive
– Requires professional installation
R-Value: Open-cell foam is around R-3.5 per inch, while closed-cell foam can be as high as R-6.5 per inch
Best For: Homes in extreme climates or those with many air leaks
R-Value and Climate Considerations
R-value measures how well insulation resists heat flow. The higher the R-value, the better the insulation.
- Cold Climates: Opt for higher R-values (R-49 or more). Spray foam or thick layers of fiberglass can be ideal.
- Moderate Climates: R-values around R-38 are usually sufficient. Fiberglass or cellulose works well.
- Hot Climates: Focus on reflective barriers and insulation with R-values around R-30. Spray foam can also help with air sealing.
Pro Tip: Always check local building codes and ENERGY STAR recommendations for the optimal R-values in your area.
Understanding these options will help you choose the best insulation for your attic. Next, we’ll discuss whether to tackle this project yourself or call in the pros.
DIY vs. Professional Installation
Safety Equipment
Before you start insulating an attic, safety should be your top priority. Here’s what you’ll need:
- Safety glasses to protect your eyes from dust and debris.
- Gloves to avoid hand injuries and irritation from materials like fiberglass.
- Dust mask or respirator to prevent inhalation of harmful particles.
- Hard hat if you’re working under potentially sharp or heavy objects.
- Lightweight disposable coverall, gloves, and hat to keep itchy and irritating insulation off your skin.
- Kneepads for attics that require crawling.
Tools Needed
Having the right tools will make your insulation project smoother and safer:
- Utility knife for cutting insulation to size.
- Measuring tape to ensure accurate insulation placement.
- Staple gun (for batt insulation).
- Blower machine (for loose-fill insulation).
- Straight edge for cutting.
- Tape measure for precise measurements.
- Retractable utility knife and sheet metal scissors for cutting materials.
When to Call a Pro
Sometimes, it’s best to leave the job to professionals. Here’s when you should consider hiring a contractor:
- Complex Layouts: If your attic has a lot of corners, wires, or pipes, the installation can get tricky.
- Health Concerns: If you have respiratory issues or allergies, it’s safer to avoid exposure to insulation materials.
- Lack of Time or Tools: Professional installation can be faster and comes with the right equipment.
- Building Codes and Rebates: Professionals ensure compliance with local building codes and can help you qualify for energy rebates.
Case Study: One Reddit user shared their DIY attic insulation nightmare. They faced broken machines, unexpected storms, and long hours, turning the project into a “single most miserable DIY job.” They concluded, “If you have the money – write a check.”
Spray Foam Insulation USA
For those who prefer professional installation, Spray Foam Insulation USA offers expert services to ensure your attic is insulated correctly. Their team is trained, certified, licensed, and insured, providing peace of mind that the job will be done right the first time.
Pro Tip: Always confirm that the contractor is licensed and insured in your state. Make sure they agree to seal any attic holes and gaps before adding insulation. This step is crucial for maximizing energy efficiency.

Hiring a professional can sometimes be more cost-effective when considering the long-term benefits of correctly installed insulation. They have the experience to handle unexpected issues and ensure that the insulation is applied evenly and safely, covering all nooks and crannies without leaving gaps.
Next, we’ll look at common mistakes to avoid during your attic insulation project.
Common Attic Insulation Mistakes to Avoid
Insulating an attic can lead to substantial energy savings, but only if done correctly. Here are some common mistakes to avoid:
Air Leaks
Neglecting to seal air leaks is a big no-no. Imagine wearing a woolly sweater on a windy day without a windbreaker—the cold air just cuts right through. Similarly, if your attic has air leaks, the insulation won’t be as effective.
How to avoid it? Before adding insulation, check for leaks around light fixtures, wiring holes, and along the attic floor. Use caulk or spray foam to seal these gaps. This simple step can make a big difference.
Ventilation Blocking
Blocking ventilation can lead to moisture buildup, mold, and even roof damage. Your attic needs to breathe, so proper ventilation is crucial.
How to avoid it? Ensure soffit vents are not covered by insulation. You can use baffles (vent chutes) to maintain proper airflow. Keeping a clear path for air to move in and out will help regulate the attic temperature and prevent moisture issues.
Incorrect R-Value
Choosing insulation with the wrong R-value can make your efforts fruitless. The R-value measures the insulation’s ability to resist heat flow—the higher the number, the better the insulation.
How to avoid it? Consult local building codes or a professional to determine the right R-value for your climate. For example, in colder climates, you’ll need a higher R-value compared to milder regions.
Compressing Insulation
Compressing insulation by walking on it or storing items directly on top can squish out the air pockets that make it effective.
How to avoid it? Spread the insulation evenly and avoid walking on it. If you need to store items in the attic, consider building a raised platform to protect the insulation’s integrity.
Asbestos Risks
Older homes may have asbestos insulation, which poses serious health risks. Disturbing asbestos can release harmful fibers into the air.
How to avoid it? If your home was built before 1990, there’s a chance it might contain asbestos. Do not disturb the insulation. Instead, have it tested by an approved lab. Contact your local health department for more information.
By steering clear of these pitfalls, you’ll set yourself up for success. Properly insulating your attic is a smart move for energy savings and home comfort, but doing it right is key.
Next, we’ll dive into the cost and savings analysis of insulating an attic.
Cost and Savings Analysis
When it comes to insulating an attic, understanding the costs and potential savings is crucial. Here’s a breakdown of what you can expect:
Average Costs
The cost to insulate an attic can vary widely based on the type of insulation, the size of your attic, and labor costs if you choose to hire professionals. On average, homeowners spend between $1-$7 per square foot. This means the total cost can range from $500 for smaller attics to $4,000 for larger spaces.
- Fiberglass batt insulation: Typically costs around $0.30 to $1.50 per square foot.
- Loose-fill cellulose: Generally ranges from $0.50 to $1.50 per square foot.
DIY Savings
Opting for a DIY approach can save you a significant amount on labor costs, typically around $440-$680. For example, a homeowner on Reddit shared that their DIY blown-in insulation project cost approximately $300 and reduced their heating bill by half during the winter months. This kind of saving can quickly offset the initial investment in materials and equipment.
Energy Bill Reduction
Properly insulating your attic can lead to substantial reductions in your energy bills. The Department of Energy states that 25% of heat escapes through the attic, which means better insulation can result in:
- 10-20% reduction in monthly energy bills.
- 5% cut in electricity use and over 10% reduction in natural gas usage.
Return on Investment
Insulating your attic is not just about immediate savings; it’s also a great investment. Homeowners can expect up to a 116% return on investment. This means that the money saved on energy bills and potential home repairs (like roof damage and pest control) can more than cover the initial insulation costs.
Case Study: Real-Life Savings
A user on Reddit reported that after insulating their attic with 20 bags of cellulose and renting a machine for free from Home Depot, their utility bills were halved. This project, which cost around $300, paid for itself in just a few months due to the significant energy savings.
Financial Incentives
Don’t forget to explore financial incentives that can make your insulation project more affordable:
- Rebate Incentives: Check with your local utility company and the ENERGY STAR Rebate Finder for potential rebates.
- Federal Tax Credits: Up to 30% of the cost of insulation (not exceeding $1,200) can be claimed as a tax credit.
- Assistance for Low-to-Moderate Income Families: The Department of Energy’s Weatherization Assistance Program (WAP) offers support for eligible households, including home energy assessments and common home improvements.
By taking advantage of these incentives, you can further reduce the cost of your attic insulation project and enhance your home’s energy efficiency.
Next, we’ll explore how to enhance attic insulation effectiveness.
Enhancing Attic Insulation Effectiveness
Properly insulating an attic is a great start, but there are several ways to enhance its effectiveness further. Let’s dive into key techniques that can make a significant difference: air sealing, moisture control, vent chutes, attic hatch insulation, and reflective barriers.
Air Sealing
Before you even start insulating, it’s crucial to seal air leaks. Air leaks can undermine the effectiveness of your insulation by allowing warm or cool air to escape. This is particularly important around areas like light fixtures, ductwork, and chimney shafts. Use caulk or foam sealants to seal these leaks.
“No amount of insulation is going to help if you don’t seal your attic properly,” emphasizes expert Olson.
Moisture Control
Moisture is the enemy of effective insulation. It can cause mold growth and reduce the insulative properties of your materials. Ensure that your attic is well-ventilated and consider using vapor barriers to control moisture levels. Without proper moisture control, you might face structural damage that could cost upwards of $10,000 to repair.
Vent Chutes
Vent chutes, also known as baffles, help maintain airflow from the soffits to the attic. This airflow is essential for preventing moisture buildup and ensuring that your attic “breathes.” Blocking soffit vents with insulation materials can lead to moisture problems and deteriorate air quality inside your home.
Attic Hatch Insulation
The attic hatch is often overlooked but can be a significant source of air leaks. Insulating your attic door is crucial because it’s one of the most common places where air leaks occur in a home. Here are some simple yet effective DIY steps:
- Check for air leaks and install weather stripping.
- Add insulation panels to the attic door, either in the form of fiberglass or rigid foam board.
- Ensure a snug fit and seal any remaining gaps with caulk or expandable foam.
Reflective Barriers
Reflective barriers, also known as radiant barriers, can be an excellent addition to your attic insulation strategy. These barriers reflect radiant heat away from your home, keeping it cooler in the summer. They are particularly effective in hot climates and can be installed on the attic floor or under the roof.
By focusing on these techniques, you can significantly improve the effectiveness of your attic insulation, leading to better energy efficiency and a more comfortable home environment.
Next, we’ll answer some frequently asked questions about attic insulation.
Frequently Asked Questions about Attic Insulation
Is Attic Insulation Worth It?
Absolutely! Attic insulation is a smart investment for several reasons:
- Energy Savings: Proper insulation can reduce your heating and cooling bills significantly. One homeowner reported a more than 50% reduction in their heating bill during the winter after installing blown-in insulation.
- Comfort: Insulation helps maintain a consistent indoor temperature, making your home more comfortable year-round.
- HVAC Longevity: Your HVAC system won’t have to work as hard, potentially extending its lifespan.
- Home Value: Many buyers look for energy-efficient homes. A well-insulated attic can increase your home’s resale value, offering up to a 116% return on investment.
How Often Should Attic Insulation Be Replaced?
Attic insulation can last up to 50 years if it remains dry and undisturbed. However, several factors might necessitate earlier replacement:
- Water Damage: Wet insulation needs to be replaced to prevent mold and mildew.
- Infestations: Pests can damage insulation, making it less effective.
- Physical Damage: Renovations or foot traffic can compress or displace insulation, reducing its effectiveness.
Annual inspections are a good practice to ensure your insulation continues to perform optimally.
Can I Insulate My Attic Myself?
Yes, you can, but there are pros and cons to consider:
Pros of DIY Insulation:
- Cost Savings: You save on labor costs. DIY attic insulation can be less expensive upfront compared to hiring professionals.
- Control: You have complete control over the materials and methods used.
Cons of DIY Insulation:
- Materials Cost: You’ll need to purchase insulation and possibly rent equipment like an insulation blower for loose-fill materials.
- Time Investment: DIY projects require time for planning, shopping, and installation. Depending on your familiarity, this could take a weekend or longer.
- Quality and Efficiency: Professional installers often secure materials at a lower cost and achieve more efficient, effective installation. Mistakes in DIY installation can lead to reduced effectiveness, potentially costing more in the long run through higher energy bills.
Example: A Reddit user shared that they re-insulated their attic with 1600 sqft of blown-in insulation after air sealing, costing $2,000. They compared their gas usage for heating, showing a 32% reduction in March and saving around $50 per month.
By understanding these key aspects, you can make informed decisions about attic insulation that will benefit your home’s comfort, efficiency, and value. Whether you choose a DIY approach or hire a professional, the goal is to achieve a well-insulated attic that enhances your home’s energy efficiency and comfort.
Next, we’ll explore the cost and savings analysis of insulating an attic.
Conclusion
Energy STAR Home Upgrade
Insulating your attic is a crucial step in making your home more energy-efficient. As part of the ENERGY STAR Home Upgrade, ensuring your attic is well-insulated and sealed can significantly reduce energy waste. This not only helps in maintaining a comfortable indoor temperature but also reduces the strain on your heating and cooling systems. The result? Lower energy bills and a more sustainable home.
Sustainable Solutions
Choosing eco-friendly insulation options is essential for reducing your carbon footprint. At Spray Foam Insulation USA, we prioritize sustainable materials and methods. Our spray foam insulation is designed to seal gaps and cracks effectively, reducing the need for excessive heating and cooling. This means less energy consumption and a greener home. Plus, our products are made from materials with low environmental impact, ensuring that your insulation upgrade is both effective and kind to the planet.
Spray Foam Insulation USA
When it comes to insulating your attic, Spray Foam Insulation USA is your go-to expert. We offer top-notch insulation solutions tailored to your specific needs. Whether you’re looking to take on a DIY project or prefer professional installation, our team is here to support you every step of the way. Choosing Spray Foam Insulation USA means opting for quality, efficiency, and peace of mind.
Ready to make your home more energy-efficient? Contact us today for a free estimate and let’s make your home the best it can be.
By investing in proper attic insulation, you’re not just enhancing your home’s energy efficiency and comfort—you’re also contributing to a sustainable future. So why wait? Start your attic insulation project today and enjoy the benefits for years to come.