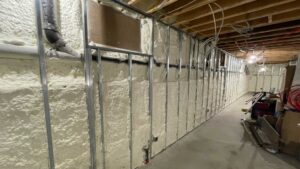
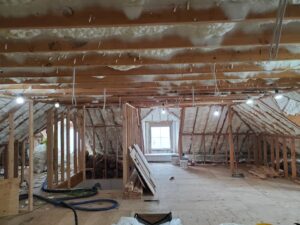
When you’re exploring options for rigid foam insulation, you’re likely seeking solutions that offer not just energy efficiency but also enhance the comfort of your living or workspace. In simple terms, rigid foam insulation is a compact, high-performance insulation material used in various applications to reduce energy transfer and improve indoor climate control.
- Expanded Polystyrene (EPS): Cost-effective, versatile, suitable for below-grade applications.
- Extruded Polystyrene (XPS): Moderate cost, high moisture resistance, ideal for walls or below grade.
- Polyisocyanurate (ISO): Highest R-value per inch, best suited for roofing, more expensive.
These materials are designed to fit snug within your building’s framework, acting as a barrier against the external environment. By limiting the transfer of heat, rigid foam insulation helps maintain a consistent temperature indoors, contributing to a significant reduction in heating and cooling costs. Whether it’s sweltering summer days or freezing winter nights, well-insulated walls and roofs mean your HVAC systems work less, saving you money and improving your carbon footprint.

Understanding which type of rigid foam insulation best fits your needs can be the first step toward a more energy-efficient and comfortable property.
Understanding Rigid Foam Insulation
When it comes to keeping your home cozy and cutting down on energy bills, rigid foam insulation is a game-changer. Let’s break it down into simple bits: what it is, the types available, how it’s installed, and the idea of continuous insulation.
Types of Rigid Foam Insulation
There are three main players in the rigid foam insulation arena:
-
Expanded Polystyrene (EPS): Think of this as the all-rounder. It’s versatile, cost-effective, and has an R-value of about 4.6 per inch. It’s the foam board you see in a variety of applications, from roofs to floors.
-
Extruded Polystyrene (XPS): This is the colorful cousin, often found in blue, green, or pink. It’s a bit of a step up in both cost and R-value, sitting at around R-5 per inch. It’s tougher and great for below-grade applications like basements.
-
Polyisocyanurate (ISO): The heavyweight, with an R-value of R 5.8 per inch, and it’s usually covered in a foil layer. It’s pricier but packs a punch in thermal resistance.
R-Values: What’s the Deal?
R-value measures how well insulation can resist heat flow. The higher the R-value, the better it keeps heat in (or out). Different types of rigid foam have different R-values, so choosing the right type can make a big difference in your home’s energy efficiency.
Installation: Getting It Right
Installing rigid foam insulation isn’t rocket science, but there are a few key things to remember. First, you want to make sure you’re sealing it properly to prevent air and moisture from sneaking through. This might mean using tape or a specific adhesive to seal the joints between panels.
In areas with high humidity or direct exposure to water, you’ll also want to consider the type of foam insulation you’re using. EPS and XPS can handle moisture pretty well, but always double-check to make sure what you’re using fits the bill for your specific situation.
Continuous Insulation: Keeping It Cozy
Continuous insulation means covering an entire area with insulation, without leaving any gaps. This reduces thermal bridging, where heat passes through the less insulated parts of a building’s structure (like wood or steel frames). By using rigid foam insulation across the whole surface, you create a consistent barrier that keeps your home’s temperature steady, making it more comfortable and energy-efficient.
In summary, understanding the types of rigid foam insulation, their R-values, and the importance of proper installation and continuous coverage can help you choose the best insulation for your home. This knowledge sets the stage for a warmer, more efficient living space that saves you money in the long run. Next up, we’ll dive into the pros and cons of each type of rigid foam insulation, so you can make an informed decision that meets your needs.
Types of Rigid Foam Insulation
When it comes to insulating your home, not all rigid foam insulations are created equal. Each type has its own set of benefits and ideal applications. Let’s explore the three main types: Expanded Polystyrene (EPS), Extruded Polystyrene (XPS), and Polyisocyanurate (Polyiso).
Expanded Polystyrene (EPS)
Expanded Polystyrene (EPS) is like the Swiss Army knife of insulation. It’s incredibly versatile, finding its place in roofs, walls, floors, and even below-grade applications. Think of EPS as the budget-friendly champion; it offers the highest average R-value per dollar, around 4.6 R per inch. It’s also kind to your wallet, meeting or exceeding all required building and energy codes without breaking the bank.
- Key Benefits:
- Cost-effective
- High R-value per dollar
- Versatile across various applications
- Water-resistant over the long term
EPS doesn’t hold onto water, making it a solid choice for areas that might get a bit damp. Plus, it’s approved for ground contact and can be treated to resist insects, adding to its versatility.
Extruded Polystyrene (XPS)
Extruded Polystyrene (XPS) is the middle child in terms of cost and R-value, striking a balance between performance and price. Recognizable by its vibrant colors—blue, green, or pink—XPS is a go-to for walls and below-grade applications. With an R-value of about R-5 per inch, it’s a bit pricier than EPS but offers excellent moisture resistance.
- Key Benefits:
- Strong moisture resistance
- Recyclable
- Balanced cost and performance
However, XPS tends to absorb more moisture over time compared to other types of rigid foam insulation. It’s something to keep in mind, especially in environments where long-term moisture exposure is a concern.
Polyisocyanurate (Polyiso)
Polyisocyanurate (Polyiso) is often hailed as the heavyweight champion of rigid foam insulation, especially in roofing applications. It boasts a higher R-value, around R-5.8 per inch, making it the most efficient per inch among the three. Polyiso is typically more expensive, reflecting its superior insulation capabilities.
- Key Benefits:
- Highest R-value per inch
- Ideal for roofing applications
- Foil-faced options act as a radiant barrier
Polyiso panels are always faced, affecting their performance in terms of durability and moisture resistance. Foil-faced panels are impermeable, making them an excellent choice for creating an exterior vapor barrier.
Choosing the Right Type for Your Project
Selecting the right type of rigid foam insulation boils down to understanding your specific needs:
- For budget-conscious projects where versatility is key, EPS might be your best bet.
- If moisture resistance is a priority, especially in below-grade applications, XPS offers strong performance.
- For the highest insulation value, particularly in roofing or where space is limited, Polyiso stands out.
The right insulation can significantly enhance your home’s energy efficiency and comfort. Consider consulting with a professional to determine the most suitable type for your project.
Next, we’ll look into the advantages and disadvantages of these insulation types, helping you weigh the pros and cons before making a decision.
Advantages and Disadvantages of Rigid Foam Insulation
When choosing insulation, it’s crucial to understand both the good and the not-so-good aspects. Rigid foam insulation is no exception. Let’s dive into the pros and cons to help you decide if it’s the right choice for your home or project.
Pros
- Energy Efficiency: Rigid foam insulation has a high R-value per inch, making it very effective at slowing down the transfer of heat. This means it can help keep your home warmer in the winter and cooler in the summer, potentially lowering your energy bills.
- Moisture Resistance: Some types of rigid foam, like Extruded Polystyrene (XPS), are excellent at resisting moisture. This makes them ideal for use in damp areas or places prone to water exposure.
- Versatility: Whether you’re insulating a roof, a wall, or a floor, there’s a type of rigid foam insulation that’s suitable. It can be used in a wide range of applications, from below-grade to above-grade.
- Durability: Rigid foam doesn’t settle or sag over time, maintaining its effectiveness for the life of your home. It’s also insect-resistant and can handle some physical impact without damage.
Cons
- Cost: Generally, rigid foam insulation is more expensive upfront than traditional insulation materials like fiberglass. However, the potential energy savings can offset this initial investment over time.
- Installation Challenges: Cutting and fitting rigid foam boards can be more labor-intensive than installing other types of insulation. It often requires precise cutting and sealing to avoid gaps that could reduce its effectiveness.
- Environmental Impact: The manufacturing process of some rigid foam products can have a larger environmental footprint, mainly due to the chemicals used. However, many manufacturers are moving towards more eco-friendly blowing agents and materials.
- Fire Safety: Without proper fire-resistant covering, rigid foam insulation can be a fire hazard. Building codes typically require it to be covered with a fire-rated material like drywall.
Considering Energy Costs and Air/Moisture Leaks
One of the biggest advantages of rigid foam insulation is its potential to lower energy costs. By providing a high R-value and reducing thermal bridging, it keeps your home’s temperature more consistent without overworking your heating or cooling system. However, for maximum effectiveness, it’s crucial to install it correctly and seal any air leaks. Even the best insulation can’t do its job if air and moisture can pass through unimpeded.
When it comes to preventing air and moisture leaks, the type of rigid foam and the installation method matter. For example, Extruded Polystyrene (XPS) and Polyisocyanurate (Polyiso) have strong moisture resistance and can act as a barrier against water vapor when installed with proper seals. Expanded Polystyrene (EPS), while still effective, may require additional vapor barriers in high humidity areas.
In conclusion, rigid foam insulation offers a mix of high energy efficiency, durability, and versatility but comes with higher initial costs and installation considerations. Weighing these pros and cons against your specific needs and project goals will help you make an informed decision. Achieving the best results often involves consulting with insulation professionals who can provide guidance based on your home’s unique characteristics.
We’ll cover some practical tips and best practices for installing rigid foam insulation, ensuring you get the most out of your investment.
Installation Tips and Best Practices
Installing rigid foam insulation can be a game-changer for your home’s energy efficiency and comfort. But, to get it right, there are a few key things you need to know. Let’s dive into some essential tips and best practices that will help you nail the installation process.
Sealing for Success
Why It Matters: Proper sealing is critical. Even the smallest gaps can let air and moisture sneak through, undermining your insulation’s effectiveness.
How to Do It: Use tape designed for foam board insulation to seal all edges and joints. For larger gaps, expanding foam spray can fill in those tricky spots. The goal is an airtight seal.
Understanding Vapor Barriers
The Basics: A vapor barrier helps prevent moisture from getting into your walls. This is especially important in climates with high humidity or extreme temperatures.
When You Need One: If you’re installing rigid foam on the interior of your home, you might not need an additional vapor barrier. That’s because many foam boards act as a vapor retarder. However, always check local building codes and the product’s specifications.
Tackling High Humidity Areas
Challenges: In places like bathrooms or kitchens, moisture is a constant battle. Without proper precautions, insulation can become damp, leading to mold or mildew.
Solutions: Choose insulation with a higher resistance to moisture. Covering your foam board with a waterproof material can add an extra layer of protection. Also, ensure good ventilation in these areas.
Preventing Moisture Infiltration
The Risk: Moisture infiltration can reduce the effectiveness of your insulation and cause damage over time.
Prevention Tips:
– Install a continuous layer of rigid foam to minimize thermal bridging.
– Use a product suitable for your specific application (below grade, exterior, interior).
– Pay special attention to the foundation and roof, where water often finds a way in.
Quick Checklist for Installation:
1. Measure Twice, Cut Once: Ensure your foam boards fit snugly between joists or studs.
2. Seal It Tight: Use tape and foam spray to seal all joints and edges.
3. Check for Gaps: After installation, inspect for any missed spots that could let air or moisture through.
4. Follow Local Codes: Always ensure your installation meets all local building regulations.
By keeping these tips and best practices in mind, you’re setting yourself up for a successful rigid foam insulation installation. The goal is not just to insulate but to create a more comfortable, energy-efficient home. With careful planning and attention to detail, you can achieve excellent results that last for years to come.
Next, we’ll address some of the most common questions homeowners have about rigid foam insulation. From understanding R-values to ensuring you’ve installed your insulation correctly, we’ve got you covered.
FAQs on Rigid Foam Insulation
When it comes to rigid foam insulation, there are always a few questions that pop up more often than others. Let’s dive into some of these frequently asked questions to help you better understand how to use rigid foam insulation in your home.
Do I need a vapor barrier with rigid foam insulation?
Short answer: It depends on your specific situation, but rigid foam insulation often acts as a vapor barrier itself.
Rigid foam insulation, especially extruded polystyrene (XPS) and polyisocyanurate (Polyiso), has a low permeability rating. This means it can effectively slow down the passage of moisture through walls. In many cases, when you install rigid foam insulation on the exterior of your home, you might not need an additional vapor barrier. However, it’s always best to check local building codes and consult with a professional to make sure your home is properly protected against moisture.
What is the R-value of 2 inch rigid foam?
The R-value is a measure of insulation’s ability to resist heat flow. The higher the R-value, the better the insulation material is at reducing energy consumption.
For a 2-inch thick board:
– Expanded Polystyrene (EPS) typically has an R-value of about R-4 to R-4.6 per inch, so a 2-inch board would be around R-8 to R-9.2.
– Extruded Polystyrene (XPS) comes in at about R-5 per inch, making a 2-inch board around R-10.
– Polyisocyanurate (Polyiso) has the highest R-value of the three, with about R-5.6 to R-6 per inch, so a 2-inch board would range from R-11.2 to R-12.
The actual R-value can vary based on the specific product and manufacturer.
How to properly install rigid foam insulation?
Proper installation is key to getting the most out of your rigid foam insulation. Here are a few tips:
-
Measure and Cut Precisely: Measure the space where you’ll be installing the foam board and cut your insulation to fit snugly. A tight fit helps prevent air leaks.
-
Seal the Gaps: Use tape or foam sealant to seal the joints between each piece of rigid foam to prevent air leaks. This step is crucial for maximizing the effectiveness of your insulation.
-
Cover with a Protective Layer: In most cases, especially for interior applications, you’ll need to cover the rigid foam with a fire-resistant material like drywall. This is a safety requirement in many building codes.
-
Check for Moisture: Before installation, ensure the area is dry. If you’re installing rigid foam on the exterior, make sure there’s a way for any moisture that does get behind the foam to drain away.
-
Consult Local Codes: Always check your local building codes to ensure compliance, especially regarding fire safety and vapor barrier requirements.
By keeping these tips and best practices in mind, you’re setting yourself up for a successful rigid foam insulation installation. The goal is not just to insulate but to create a more comfortable, energy-efficient home. With careful planning and attention to detail, you can achieve excellent results that last for years to come.
Next, we’ll explore how rigid foam insulation fits into the broader context of sustainability and energy efficiency, and why companies like Spray Foam Insulation USA are committed to providing eco-friendly insulation solutions that contribute to a healthier planet.
Conclusion
When we talk about rigid foam insulation, we’re diving into a world where sustainability, comfort, and efficiency intersect. It’s not just about keeping your home warm in the winter and cool in the summer; it’s about making choices that benefit our planet and our future.
Sustainability
At Spray Foam Insulation USA, we’re deeply committed to the environment. We understand that every product we use in our homes has an impact on the world around us. That’s why we focus on providing insulation solutions that are not only effective but also eco-friendly. Rigid foam insulation, with its high R-values and durability, plays a crucial role in this mission. It helps reduce energy consumption by creating a tight seal against air and moisture infiltration, which in turn, lowers carbon footprints and promotes a healthier environment.
Comfort
Imagine living in a home that feels just right, season after season. That’s the comfort we aim to provide with our insulation solutions. Rigid foam insulation contributes significantly to creating a consistent indoor climate by minimizing drafts and temperature fluctuations. This means you can enjoy a cozy home in the winter and a cool retreat in the summer, all while knowing you’ve made an energy-efficient choice.
Efficiency
Efficiency is at the heart of what we do. By choosing the right type of rigid foam insulation for your home, you’re not just saving on energy bills; you’re also investing in a solution that’s designed to perform for years to come. Our insulation options boast high R-values, meaning they provide superior resistance to heat flow. This efficiency doesn’t just translate to immediate savings—it means your home will require less energy for heating and cooling in the long run, further contributing to a sustainable lifestyle.
At Spray Foam Insulation USA, we’re more than just a service provider. We’re your partner in creating a more sustainable, comfortable, and efficient home. Our commitment to innovation and eco-friendly practices ensures that we’re always at the forefront of the insulation industry, offering solutions that meet the needs of today and tomorrow.
Ready to enhance your home’s energy efficiency and comfort? Contact us today for a free estimate, and take the first step towards a more insulated, efficient, and comfortable living space.
By choosing us, you’re not just insulating your home; you’re also contributing to a greener, more sustainable world. Let’s work together to make a difference—one home at a time.


